

Learn to tie knots
Working knots, as opposed to decorative knots, are a valuable skill to learn particularly when working in potentially dangerous conditions.
There are 4 main types of knots and we’re going to show you how to make one of each type. If you don’t have a rope to hand, how about trying with a shoelace?
However working out how to create the knot is just the first step, it’s important to keep practising so you can create them without thinking if you want to rely on them.
Figure of Eight – a stopper knot
You’d tie this knot on the end of a rope or string to stop it slipping.
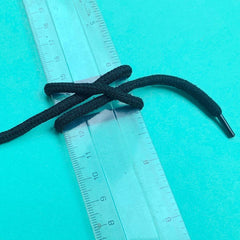
1. Make a loop in the end of the string by passing the end back over itself.


Bowline – a loop knot
The bowline (pronounced ‘bo-lin’) knot allows you to create a loop at the end of the rope which can be a fixed size or tightened around an object.
1. Make a loop in the string slightly away from the end.

2. Pass the end of the string through the loop and pull part way through.
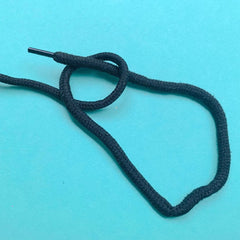
3. Pass the end of the string back under the string.

4. Push the end of the string down through the first loop you made.

5. Pull the end of the string to tighten the knot and you will see the loop you’ve made.

Reef – a bend knot
This knot is used to tie two ends of ropes of a similar size together. Remembering the phrase ‘left over right and under, then right over left and under’ may help.
1. Cross the left rope over the right one.

2. Bring the left rope under the other one.

3. Take the two ends of the rope and now cross the other rope over the first.

4. Bring the second rope under the first (into the centre of the knot).

5. Pull both ends to tighten the knot.

Clove hitch – a hitch knot
Hitches are knots which fasten a rope to another object. The clove hitch isn’t especially secure and may be used in conjunction with other knots.
1. Pass the bulk of the rope around the back of the object.

2. Take the end of the rope and cross it over the rope at the front of the object making a cross.

3. Take the end of the rope behind the object and back to the front.

4. Push the end of the rope under itself on the right-hand side of the cross you made at the front.

5. Pull the end and the bulk of the rope in opposite directions to tighten.